
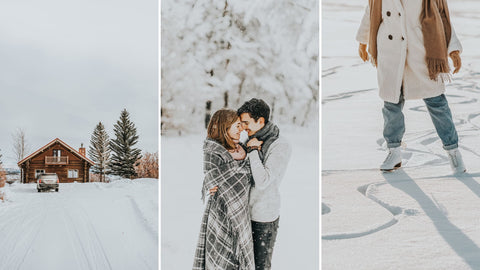
Introduction
It's that time of year again. A time for getting together with friends and family, putting on some holiday tunes, and taking beautiful photos to remember the season. It's also a time when many people feel overwhelmed by the pressure to take great photos. So here's a list of my favorite tips for capturing special moments of your life this Christmas:
Take your time to set up the shot
Take your time to set up the shot. Make sure you have a good composition and are close enough to get the right angle. Also, make sure that you have enough light so that your subject is in focus. If you’re shooting macro photography, then this can be a little tricky because the lens will magnify movement which could cause some blur if there isn’t enough light hitting your camera sensor. Take a test shot and make sure everything is in focus before moving on from each different position if necessary.
Once you are ready to take pictures of your subjects, try using manual mode so that you can control how much light reaches the sensor by adjusting shutter speed (how long it stays open) and aperture (how much light passes through).

Consider shooting in Manual
-
Decide what kind of picture you want to take.
-
Set your camera in manual mode.
-
Focus on your subject, and adjust the aperture accordingly (this will make sure that the background is out of focus). Adjusting the shutter speed allows you to control how much light enters through your lens, so it's important to ensure that there isn't too much or too little light hitting your sensor.
-
Take a test shot with all these settings in place; then look at the resulting photo on your screen, making any adjustments necessary until you have a well-exposed image that shows off all aspects of your subject well

Use the flash or external light source when needed
-
Use flash when needed. If you're taking a photo at night, in low-light conditions, or if there are shadows on your subject's face (or in their eyes), use the flash to fill in those shadows and create a more evenly lit scene.
-
Use an external light source when needed. If you want to add some color temperature to your scene that isn't available from daylight or indoor lighting sources (e.g., tungsten), then use a colored gel filter over your flash (or around an external light source). You can also use this technique if it's dark outside but there are still some colors present in the scene that would benefit from being washed-out by an artificial light source such as a window with curtains or streetlights outside--instead of relying on natural purple tones coming through windows at night time!
-
Use flash to remove red eye effect caused by reflected light coming into pupils while shooting photos indoors where fluorescent lights are used extensively like classrooms or offices etcetera...
Shoot in RAW
If you don’t already know what the RAW file format is, it’s a digital image file type that contains unprocessed data from your camera's sensor. This means that there are no in-camera adjustments made to these photos—but they can be edited later on and converted into JPEGs.
RAW files contain more information than JPEGs, which allows them to be edited more easily after the fact. You should shoot at least one photo in RAW for every scene or subject you want to capture during the holidays; this gives you more options when editing your images later and will help ensure that your photographs look great year after year!

Capitalize on those bursts of natural light for your indoor photos
If you're not a fan of the flash, or if it's too dark in your house to use one, then try using natural light instead. Natural light is very different than artificial light, so don't expect to get the same results by simply moving your camera from indoors to outside.
First off, when taking pictures with natural light (as opposed to a flash) remember that there are two ways that you can use it: indirect and direct. Indirect lighting comes from behind your subject while they're facing away from the sun/windows/doors/etc., resulting in softer shadows and less harsh shadows on their faces than direct lighting would provide. Direct lighting is what happens when you point your camera directly at something that's been directly lit by the sun (like snow on Christmas morning). It creates strong contrast between bright areas like snowdrifts and dark areas like bushes or trees behind them because all of those surfaces are receiving equal amounts of sunlight but reflect different amounts back toward us due to their coloration (which is why white objects tend not look as bright as other colors do under similar conditions).

Ensure your subjects are well lit and exposed
The first thing you need to consider when taking photos of your Christmas tree is properly exposing the subject. If your subject isn't exposed correctly, then it won't look right in your photo.
There are a few things that can help ensure proper exposure:
-
Use your camera's exposure meter to determine what settings will give you the best results. It'll tell you whether the photo will be too dark or too light and if adjustments need to be made.
-
Use a lens with a wide aperture (low f-stop number) so that more light enters through the lens during an exposure, making it easier for metering systems to detect how much light there is available at any given moment within an image frame

Back up your photos
Backing up your photos is the most important thing you can do as a photographer. If you don’t back up, then all of those precious memories are gone forever if something happens to your camera or memory card. There are many different ways to back up photos, and each has their own pros and cons that I will go over in detail below:
-
Backing up to the Cloud – This is probably the easiest method for backing up your photos because it’s automatic and doesn’t require any work from you. You have to pay for this service though so make sure that it works with your computer before committing to it. If this is too expensive for you try one of the other methods below instead!
-
Backing Up To An External Hard Drive – This type of backup requires more effort than simply uploading everything online but also provides better protection against loss or damage because there are two copies stored at separate locations (one on your computer/phone/tabletand one external hard drive). The best way to do this would be having two separate hard drives so they don't both get destroyed if something happens but failing that just try keeping them both somewhere safe like an office drawer away from children who might spill drinks etc..

Try some different angles
-
Try some different angles. Think outside the box! You don’t have to shoot your subject from above or below, but if you do, try a lower angle rather than an upward one. This is especially true if the person you’re photographing is tall—it will be more flattering for them and make their face look smaller and less imposing.
-
Make sure you can see their face clearly when you take photos from a new perspective. If it's hard for us to see someone's face in a photo, we'll generally assume that they didn't want us to see it at all—which isn't necessarily true! I once photographed a group of people eating lunch at their desks, each with his or her head down; when I showed them this proof sheet later on that day, they said they'd been too busy working to notice me taking photos (and therefore assumed that there wouldn't be any). Make sure everyone knows what's going on before pulling out your camera!

Don't be afraid to edit
You can edit your photos in Lightroom to make them more interesting and better reflect what you saw. There are creative ways to edit photos, such as using presets or filters.
Click here to check our holiday presets collections

Make your photos memorable by printing them out!
Printing your photos is a great way to preserve memories. It's also the most expensive way to do it. But there are ways to get beautiful prints at an affordable price, and we're going to share them with you!
The first thing you can do is find out if your local library offers photo printing services. A lot of libraries have partnerships with companies that specialize in printing and framing photos, so they'll likely offer some sort of discount on their products. You just need one of these super cute frames from Pottery Barn:
If your library doesn't offer this service or if it's too expensive for what you want, then consider getting more prints made by using different labs—the same lab won't always have the best quality work at all times (or even at any time). To find out which lab has better quality work than others around town, look up reviews online or ask friends who've used other labs in town what they thought about their experience working with those particular businesses!

Conclusion
That’s it! We hope these tips will help you take better photos this holiday season and beyond. Remember, it’s not about being perfect—it’s about having fun with your family!


